Why can't I delete a network printer in Windows? How to properly remove printer drivers Remove a printer driver from the Windows 8 registry
If you use a laptop, then you are probably a mobile user and have connected many printers to it, which over time can produce various errors due to driver confusion. This also applies to PC users who encounter various problems with the printer, in particular, the inability to install the driver, the ability to remove the old one, or the deleted printer continues to appear.
The fact is that if you simply delete the printer through the settings of Windows 10, Windows 8 or the Windows 7 control panel, it will be deleted, but the driver itself will remain and can create problems. In another situation, when you have removed the driver and printer, and it appears again, then in most cases this is due to the print queue. Let's say you sent a couple of documents for printing and deleted the printer, but the system retained information about unfinished printing and it will appear again. You just need to remove everything from the print queue. Let's look at ways to correctly remove the HP, Canon, Epson printer driver in Windows 10/7/8.1.
How to completely remove a printer driver
Before we begin. Disconnect the printer from your PC and restart your computer.
Step 1. The first thing you should do is uninstall all applications associated with the printer, be it HP, Canon or Epson. To do this, open " Control Panel" > "Uninstalling programs"> find in the list programs that may be related to printers. They are usually named after HP, Canon, Epson models.
If you are using a Windows 10 system, there may be UWP applications for the printer that will not appear in “uninstall programs”, as I have in the picture below. In this case, open " All parameters" > "Applications" > "applications and features" > Locate the list of programs that may be associated with your printer and remove them.
Step 2. Open " Control Panel" > "Equipment and sound" > "Devices and Printers" > select the printer you need, right-click on it and " Remove device". Restart your PC and the printer driver will be removed.

Step 3. If somehow Step 2 does not work for you, then let's turn to the device manager. Click Win+R and enter devmgmt.msc to open it. Next, find and expand the column associated with the printer; in Windows 10 this is “Print Queues”. Right-click on the desired printer and " Remove devices". Don't forget to check the box in a new window." Remove driver programs for this device", if asked.
An unused, old printer driver may interfere with the new one. Click on the "View" tab and check the " Show hidden devices". They will appear in a transparent color, delete them all. Restart your PC.

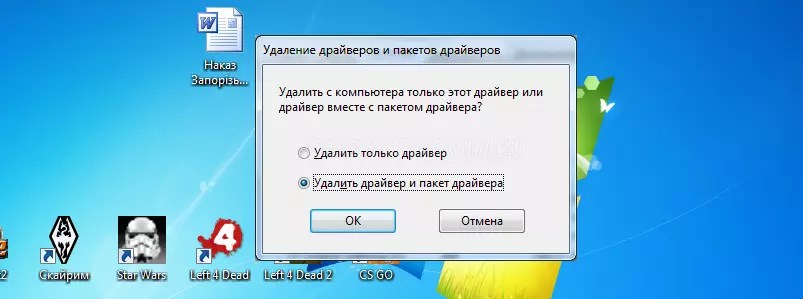
Step 4. If nothing above helps you, then this radical method should help. Press a combination of buttons Win+R enter printui /s /t2 and press Enter. In the "tab" Drivers"find the printer you want to remove along with the driver and select" Delete". In the new window, check "Remove driver and driver package". Restart your PC.

Step 5. Sometimes values in the registry, after removing printer drivers, may remain and generate errors. Click Win+R and enter regedit to open Registry Editor. In the registry, go to the following path:
- HKEY_LOCAL_MACHINE\SYSTEM\CurrentControlSet\Control\Print\Printer
- Restart your PC.

Hello blog readers. Sometimes the actions we perform on a computer or laptop do not give the expected result. In this article, we will discuss how to uninstall a printer driver in Windows XP.
The other day, a friend of mine called me asking for help with a problem that had arisen on his computer. The situation is as follows: when you open MS Office and want to print the document that opens, then when you click on “Print” or “CTRL” + “P” the office freezes. I tried to reinstall MS Office, reinstalled the drivers, but these actions did not produce any results. But I noticed that when I select another default printer, when I click on “print” the office does not freeze, as soon as I select the desired printer, everything “hangs” again. I also tried sending text to this printer from a regular notepad, and it printed without any problems. After that, I began to understand drivers, and I decided to talk about how drivers are removed in Windows XP in this article.
There are many ways to do this. In this article we will consider only the effective, most popular and convenient methods. By the way, you may find this information regarding printers useful:
So, we've finished with a little introduction, now we can begin.
First way. Uninstall the driver from the printer as you would uninstall a regular program. Go to the “Start” menu, then “Control Panel”, then “Add or Remove Programs”. You will see a list of all installed software on your computer. Here we need to find the model of our printer, click on it and click on the “Delete” button at the top of the window. Next, we follow the intuitive instructions of the removal wizard, which no longer makes sense to describe here.
The second method is the easiest in terms of PC use skills. If you have an installation CD that comes with the purchase of any electronic device, including printers, just insert it into the drive. Then you need to start the installation. Since the files are already stored on your hard drive, the system may offer several options, which include: “Recovery” and “Delete”.
The list of available functions may be wider, but in any case we are only interested in the last item, that is, “Delete”. We select it and wait until our computer automatically cleans the local disk of unnecessary printer drivers in Windows XP. After removal, you may be asked to restart your computer, so we will reboot. If you removed drivers to install new ones, you can do it now.
There is a third way to remove the printer driver in Windows XP. It is suitable for those who do not have either a CD or an inscription with the name of the printer model in the “Add or Remove Programs” menu (this sometimes happens). In this situation, we need to go to the “Start” menu, and then select “Printers and Faxes”.

A window will open in front of you. Click on the “File” button, and then click on the item: “Server Properties”.

Left-click on the “Drivers” tab and select the printer model we need. Next, click on the “Delete” button.

We confirm that you really want to remove this driver.

If the list does not contain a driver (printer model) known to you that you need to remove, then remove everything. This method helped me solve a problem that a friend of mine had. After removal, the system itself detected the printer and installed it. His joy knew no bounds, and for a whole week he wondered what to do. I even thought about reinstalling Windows. It turned out to be a very simple problem - an incorrectly installed driver.
That's all.
Today we will look at how to remove the Windows 7 printer driver if it is not removed or the printer does not work after installing the drivers. Sometimes this process is different, or the driver is simply removed or you have to tinker a little in the system to solve this problem.
To begin with, I would like to remind you that an unnecessary printer driver in Windows 7 can be removed using a CD, which usually comes with any printer model. We insert it into the drive.

Further, depending on your printer model, as well as the driver version, the information on the disk may differ, but the main idea is this: you need to start the installation process. The computer will prompt you to make a choice, which usually consists of two main options: recovery (that is, reinstallation, needed when the driver is not working correctly) and removal. We need the last point. Click on it, follow the further instructions of the program, and you can assume that the driver has been removed. You can safely install the new printer driver.
Perhaps you do not have a disk from your printer, then you can download it from the official website. For example, watch the video of how to download, then remove and install the driver again:
But what if the computer did not prompt you to make a choice, but simply automatically overwrote the data? Or perhaps you lost this CD? How to remove Windows 7 printer driver then?
By the way, here is some information for you if the printer is not deleted on other systems:
Steps to remove the printer driver
The second way to solve this problem is to remove the driver using standard Windows functions. Go to the “Start” menu, then “Control Panel”, then “Uninstall a program”.

You will see a list of all programs installed on your computer. We look for your printer model in the list, right-click on it and select: “Delete/Change” or “Delete”. Next, you need to follow the intuitive instructions of the removal wizard.

However, it may happen that the computer will not recognize the driver as a full-fledged program and you will not find your printer model in this list. In this situation, we do this: open “Start”, then “Devices and Printers”.

Right-click on our printer icon and select the “Delete device” line.

In the dialogue message we confirm that we really intend to do this.
When the device is removed, no need to restart your computer. Next, click “Start” and select “Run”. If this item is not available, then read the article: “”. Enter sservices.msc and press Enter.

A window will open in which you find the “Print Spooler” service, right-click on it and select “Restart”.


In the window that opens, find your printer driver, select it and click “Delete”. A dialog box will appear where you check the box “Remove driver and driver package” and click “OK”.

Now follow these steps: “Start” - “Run” - enter printmanagement.msc, click “OK”. Go to “Custom filters” - “All drivers”. Find the printer you need, right-click on it and click “Remove driver package...”. If a window opens, click “Delete”; when an error appears, do not think that something is going wrong - the driver has already been removed.

Do not close the “Print Management” window, go to “Print Servers” and look in “Drivers” and “Printers”, no matter what your printer is there. If it is, then remove it.

Now you can restart your computer and try installing a new Windows 7 printer driver. That's all.
Manual removal
To remove the printer driver manually, you must follow these steps:
- Go to the operating system control panel;
- Select “Devices and Printers”, after which a list of devices installed on your computer will appear on the screen;
- Delete the desired printer by right-clicking on its image with its name.

To continue removing the remaining software for the printer, go to the services menu by entering the Services.msc command in the Run menu (Win + R) or through the command line (Start ⇒ Programs ⇒ Accessories);

In the menu that opens, find “Print Manager”, right-click and select restart the service;

In the “Run” menu, enter the command printui /s /t2, which is necessary to go to the print server window;

Remove from the list all drivers with the name of your printer.
Advice: When uninstalling, a message may appear asking whether to remove the drivers along with the packages. It should be answered in the affirmative.
- Go back to the execution menu again and enter “printmanagement.msc”;
- Find the “print server” item, select the “Printers” sub-item and remove all drivers.

After completing all the necessary actions and rebooting, the system should not retain any traces of installed printers and those drivers for them that were loaded by the user or automatically after connecting the devices.
In this case, Windows will leave several universal control programs included in the OS.
Using special utilities
To make the task of removing printer drivers easier, you should use special programs.
This will allow you to avoid running system utilities and save time.
One of these utilities is, with which you can get rid of unnecessary drivers for any device.
To work with it you will need:
- launch the utility by selecting the Russian interface language;
- go to cleaning the system by clicking the “Analysis” button (in some versions – “Analyze”);
- after the utility collects information about drivers and errors in the system, make sure which of them should be removed and remove them;
- remove unnecessary control programs (in this case, for the printer).

Some printer manufacturers record applications to simplify driver removal on discs that come with the equipment.
They are even easier to use - when the media autostarts, a menu usually appears on the screen prompting you to install or remove drivers.
But even in the absence of such a window, it will not be difficult to remove drivers.

Cleaning up trash
After removing the drivers, the printer may leave traces that will be almost invisible, but still interfere with the installation of new control programs and printing of documents and images.
In order to make sure that there are no entries related to the printing device, you should use the registry editor. To do this you should:
open the run window (Win + R) and enter the command regedit

- when the program opens, select the “Edit” item in the top menu and the “Find” sub-item;
- enter the printer model (or part of it) in the field, for example, DCP-130C or simply DCP-130;
- select “Find next”, after which all files, libraries and drivers whose parameter names match the specified “mask” will be found in the registry in turn.
Most likely, the search will have to be repeated several times. After this, the computer is restarted, and now the damaged or non-working printer drivers can be reinstalled.
Solving related problems
Sometimes during the process of removing drivers, various problems arise and messages like “ driver in use" or " driver is busy».
Information may also appear indicating that it is impossible to remove the control program. If these problems occur, doing the following may help:
- Try again to do the same steps as when manually removing drivers (remove the printer from the list of devices, remove drivers and packages, restart the print manager);
- Open the registry editor and find the item HKEY_LOCAL_MACHINE\SYSTEM\CurrentControlSet\Control\Print\Environments\Windows x64\Drivers\

- Select the name of the printer whose driver the system for some reason does not allow you to remove, and rename it (for example, from DCP-130C to DCP-130C1). Now Windows does not recognize the program as a control program for this device;
- Continue trying to remove drivers. In most cases this works. If not, in the same branch of the registry editor, open not Print, but Print Processors and rename the drivers here too.

Another option for troubleshooting printer driver problems is suitable for devices from well-known brands such as Canon and HP. To do this you will need:
- Open a command line (required as administrator);
- Enter the command “net stop spooler”, stopping the print spooler;
- Go to the system disk in the folder Windows\System32\spool\;
- Find the Printers folder and clear its contents (without deleting the directory itself);
- For HP printers, you should also completely clear the contents of the drivers\w32×86 folder located there;

- Enter the net start spooler command to start Print Spooler;
- Reinstall the drivers using already known methods;
- To restart a computer.
Results
After you have removed a printer driver you no longer need using one of the above methods, you should immediately install a new one - otherwise the device will not print or will not be recognized by the system at all.
Although, basically, after loading the Windows 7 system, a message will appear on the screen about the automatic installation of control programs or an offer to find them and install them yourself.
As a result, the printer restores its functionality again. If this does not happen, there may be a problem with the device itself.
Video:
Article content:
Very often, when trying to remove printer drivers, you may encounter difficulties. In this article, we will talk about how you can fix the error “The printer driver cannot be removed...”.
Description of the error
Print Server Properties
Cannot remove driver: Driver_Name, Type 3 - user mode. The specified printer driver is busy.

If we use the recommendations given in the article:, we get the following error:

Fixing the error
Option 1
A similar error appeared on Windows Server 2008 R2, which runs in terminal mode with Easy Print active. Although none of the users used this printer, the system did not want to delete it. The following helped:
- Open "Devices and Printers" under an administrator account and delete the hated printer.
- Open "Services" (control panel - administration - services) or (start - run - services.msc) and look for the service there " Print Manager", aka "Spooler".
- Let's stop this service.
- Open the registry editor (start - run - regedit).
- Open the branch HKEY_LOCAL_MACHINE\SYSTEM\CurrentControlSet\Control\Print\Environments\Windows x64\ Drivers\
- We rename the printer driver, which the system does not allow us to delete. In our example - Brother DCP-116C, for example in Brother DCP-116C_1.
- Let's start the service" Print Manager", aka "Spooler".
- We remove the printer as described in the article:
- Profit.
If he continues to swear, I have also come across this solution on the Internet:
Option 2
- In step 5, open the branch HKEY_LOCAL_MACHINE\SYSTEM\CurrentControlSet\Control\Print\Environments\Windows x64\ Print Processors\
- We rename everything that is there, for example: hpcpp117 ==> hpcpp117_old, hpzppwn7 ==> hpzppwn7_old, winprint ==> winprint_old...
- We start the print manager service, delete the printer, stop the service, rename everything back, start the print manager service again.